 Domain SearchSecure your perfect UAE domain in seconds.
 All TLDsSecure your ideal domain. Explore local UAE and international extensions.
 WHOIS LOOKUPCheck domain ownership, expiry dates, and registrar details instantly.
 AE DomainRegister a .AE domain and build trust in the UAE.
 .com DomainGet the world’s most trusted domain and build credibility from day one.
 Web hostingFind budget-friendly hosting that doesn’t compromise on performance.
 Windows HostingHigh-performance hosting for Windows applications and websites.
 Affiliate ProgramBecome a partner and earn commission for every referral.
 WordPress HostingBlazing-Fast WordPress Hosting, Optimised for Performance.
 Email HostingSecure your communications with professional email hosting. Use your domain, stay in control.
 Reseller HostingLaunch your own hosting brand. We handle the tech, you grow your business.
 cPanel HostingHosting supported by cPanel (simple and user-friendly)
 VPS HostingVirtual servers that grow with you. Full root access. Blazing fast performance.
 Managed VPS HostingNot a tech expert? Let us handle everything with our fully managed VPS hosting.
 Dedicated ServersEnjoy full access and total control over your dedicated physical server.
You bought a UAE VPS and found a Joomla tutorial online. You pasted the commands, and something broke.
Maybe the PHP extension was missing, or the database refused to connect. Maybe Certbot returned a connection error at the SSL step.
You opened a second tab. Then a third. An hour later, your server still had no Joomla on it.
Most Joomla installation guides target servers in the United States or Europe. They skip the UAE timezone setup.
They reference outdated Joomla versions. None of them explains what happens when things go wrong on a public-facing Gulf server.
This guide fixes that. It covers a complete Joomla 6 installation on Ubuntu 22.04. You will go from a bare UAE VPS to a secured, browser-accessible Joomla admin panel.
Every command below is tested. Every common error gets a direct fix in the troubleshooting section.
Minimum VPS Specs for Joomla in the UAE
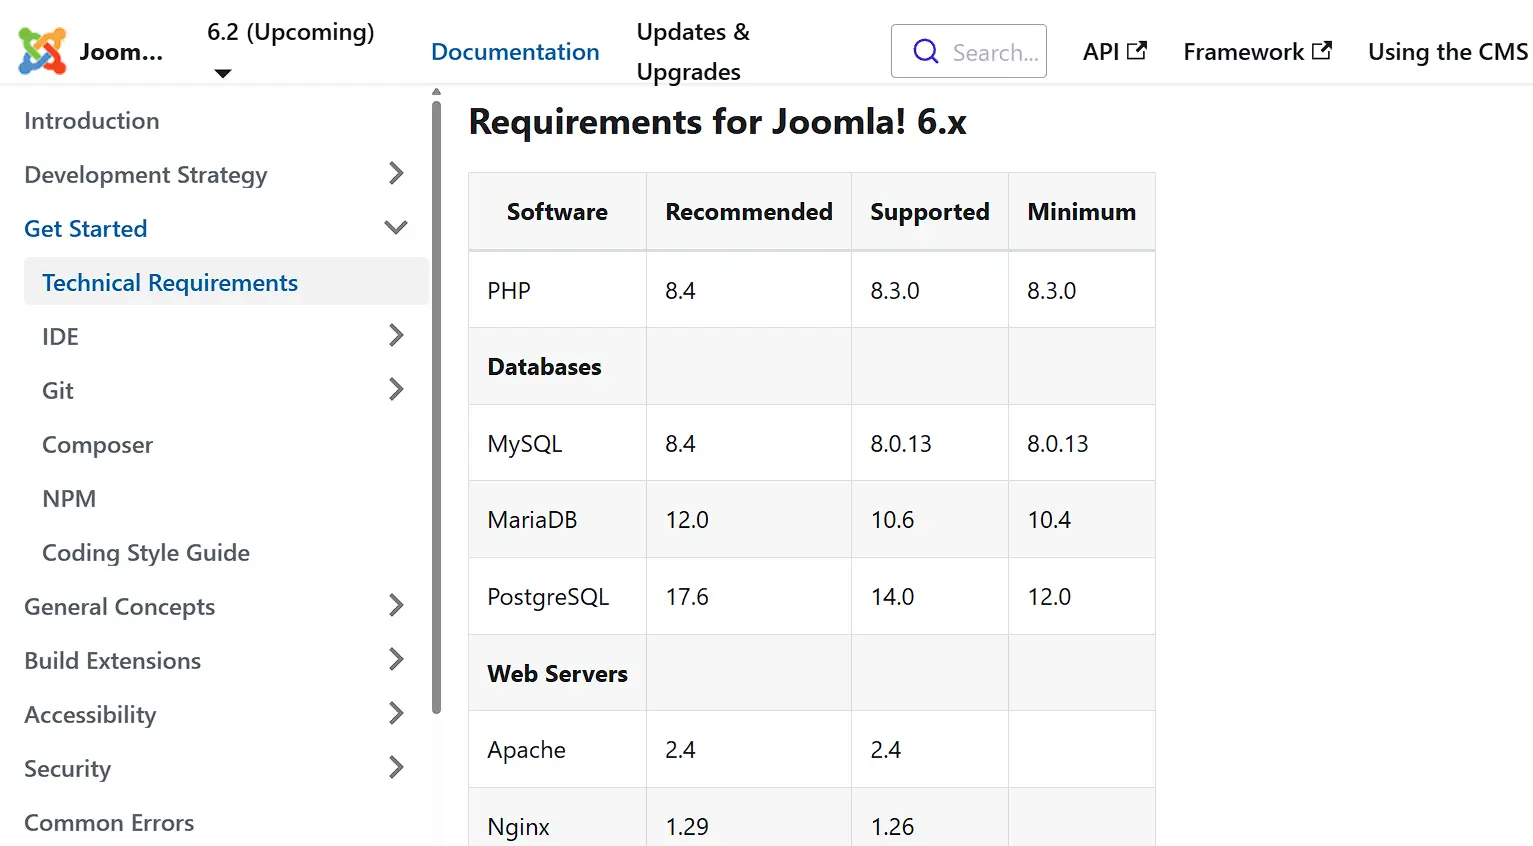
Before running a single command, confirm your server meets these requirements. Skipping this check wastes time on a server that will underperform from day one.
| Spec | Minimum | Recommended |
|---|---|---|
| RAM | 1 GB | 2 GB |
| vCPU | 1 | 2 |
| Storage | 20 GB SSD | 40 GB NVMe |
| OS | Ubuntu 22.04 LTS | Ubuntu 22.04 LTS |
| PHP | 8.1 | 8.2 |
| Database | MySQL 8.0 / MariaDB 10.4 | MySQL 8.0 |
NVMe storage cuts Joomla load times compared to standard SSDs. That gap matters for visitors in Dubai and Abu Dhabi.
A server with 2 GB RAM handles moderate traffic without swapping memory to disk.
Confirm that your VPS provider supports customizable PHP versions. Some budget providers lock PHP at a single version, which creates problems down the road.
Gather the following before opening your terminal. Missing any of these will force you to stop mid-installation.
- A registered domain name with its DNS A record pointed to your VPS IP address. DNS changes propagate in 5 to 30 minutes, but can take up to 48 hours. Do not start the SSL step until propagation is complete.
- SSH access to your server as root or a user with sudo privileges.
- A working email address for two purposes: the Let’s Encrypt SSL certificate and the Joomla super admin account.
Step 1: Configure Your UAE VPS Before Installing Anything
Log in to your VPS via SSH. The first command updates the package list and upgrades all installed packages.
apt update && apt upgrade -yInstalling a LAMP stack on an unpatched server leaves known security gaps open. Run this update before touching anything else.
Next, set the server timezone to Dubai. This affects cron job timing, Joomla scheduled tasks, and every timestamp in your server logs.
Many guides skip this step entirely. On a UAE business site, wrong log timestamps make debugging much harder.
timedatectl set-timezone Asia/Dubai
timedatectl status
The status command confirms the change took effect. You should see Time zone: Asia/Dubai (GST, +0400) in the output.
After that, create a non-root sudo user for day-to-day server management.
adduser yourusernameusermod -aG sudo yourusernameThen disable direct root SSH login by editing /etc/ssh/sshd_config and setting PermitRootLogin no. Reload SSH with systemctl reload sshd.
Configure UFW Firewall Rules
UFW (Uncomplicated Firewall) controls which ports are open on your server. Set the correct rules now, before installing Apache. This way, the firewall is active from the start.
ufw default deny incomingufw default allow outgoingufw allow OpenSSHufw allow 80/tcpufw allow 443/tcpufw enablePort 22 stays open for SSH access. Port 80 stays open even after you add SSL.
The Let’s Encrypt certificate tool, Certbot, uses port 80 to verify domain ownership.
If port 80 is closed, Certbot will fail with a connection error at the SSL step.
ufw statusRun ufw status to confirm the rules are active. The output should list 80/tcp, 443/tcp, and OpenSSH, all showing as ALLOW.
Step 2: Install the LAMP Stack on Ubuntu 22.04
The LAMP stack is the server environment in which Joomla runs. It stands for Linux, Apache, MySQL, and PHP.
Ubuntu 22.04 is the Linux layer. The following steps install the other three components.
Install Apache Web Server
To install Apache, run the following commands one by one:
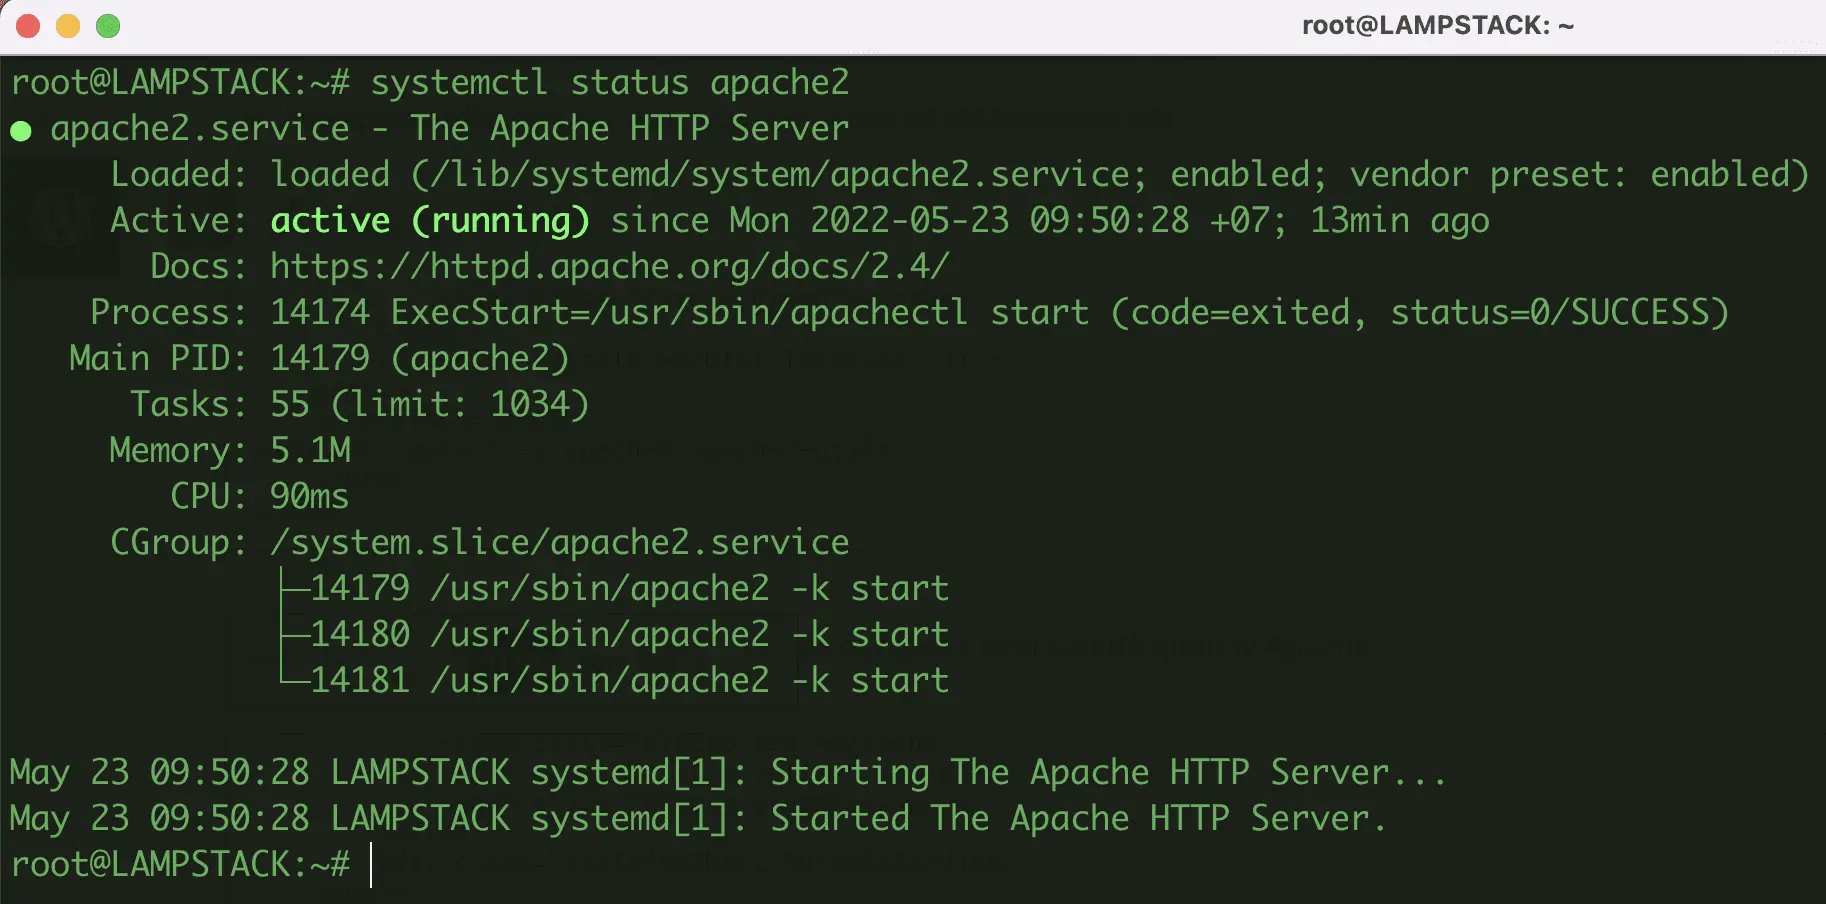
apt install apache2 -ysystemctl start apache2systemctl enable apache2To verify that the installation was successful and Apache is running, run this command:
systemctl status apache2The output should show active (running). Then enable the mod_rewrite module. Without it, Joomla’s search-engine-friendly URLs will not work.
a2enmod rewrite
systemctl reload apache2
Install MySQL and Secure the Database Server
Run the following commands to install MySQL and secure the database server before proceeding.
apt install mysql-server -ysystemctl start mysqlsystemctl enable mysqlRun the security script next. This step removes the test database, disables remote root login, and sets a root password.
mysql_secure_installationYou will see several prompts. Use the table below as a reference:
| Prompt | Recommended Response |
|---|---|
| Set up the VALIDATE PASSWORD component? | Y |
| Remove anonymous users? | Y |
| Disallow root login remotely? | Y |
| Remove test database? | Y |
| Reload privilege tables now? | Set up the VALIDATE PASSWORD component? |
Each of these settings reduces the attack surface on your database. A UAE VPS with a public IP address faces constant automated scan attempts. Running this script is not optional.
Install PHP 8.2 and Required Extensions
Joomla 6 requires PHP 8.1 or 8.2. PHP 8.2 is the better choice for a new installation. Install PHP with all the extensions Joomla needs in a single command.
apt install php8.2 libapache2-mod-php8.2 php8.2-mysql php8.2-cli \

php8.2-mbstring php8.2-json php8.2-curl php8.2-gd php8.2-xml \

php8.2-zip php8.2-intl php8.2-bcmath php8.2-soap -y
Step 3: Create a MySQL Database for Joomla
Joomla stores all site content, user data, and settings in a MySQL database. You need to create that database and a dedicated user account before running the Joomla installer.
To create the database, user, and privileges, start by logging into MySQL as root:
mysql -u root -pEnter the root password you set during the mysql_secure_installation step. Then run these commands inside the MySQL shell:
CREATE DATABASE joomla_db;CREATE USER 'joomlauser'@'localhost' IDENTIFIED BY 'YourStrongPassword123!';GRANT ALL PRIVILEGES ON joomla_db.* TO 'joomlauser'@'localhost';FLUSH PRIVILEGES;
EXIT;Replace YourStrongPassword123! with a password you generate yourself.
The FLUSH PRIVILEGES command applies the new user permissions immediately. Skipping it means the new user credentials will not work until the next MySQL restart.
Step 4: Download and Deploy Joomla 6 Files
Get the latest Joomla 6 release URL from Joomla before running the command below. Replace the URL in the wget command with the current stable release link.
cd /tmpwget https://downloads.joomla.org/cms/joomla5/6-x-x/Joomla_6-x-x-Stable-Full_Package.zipCreate the web directory and extract the Joomla files into it:
mkdir -p /var/www/html/joomlaunzip /tmp/Joomla_5-x-x-Stable-Full_Package.zip -d /var/www/html/joomlaSet the correct ownership so Apache can read and write the files:
chown -R www-data:www-data /var/www/html/joomlaThen set the correct permissions for directories and files separately:
find /var/www/html/joomla -type d -exec chmod 755 {} \;

find /var/www/html/joomla -type f -exec chmod 644 {} \;
Incorrect permissions are the second most common cause of Joomla installation failure.
Directory permissions at 755 allow Apache to read and execute. File permissions at 644 allow Apache to read without allowing public write access.
Create the Apache Virtual Host for Joomla
Create a new Apache configuration file for your domain:
nano /etc/apache2/sites-available/joomla.confPaste the following configuration. Replace yourdomain.com with your actual domain name.
<VirtualHost *:80>

    ServerName yourdomain.com

    ServerAlias www.yourdomain.com

    DocumentRoot /var/www/html/joomla

    <Directory /var/www/html/joomla>

        AllowOverride All

        Require all granted

    </Directory>

    ErrorLog ${APACHE_LOG_DIR}/joomla_error.log

    CustomLog ${APACHE_LOG_DIR}/joomla_access.log combined

</VirtualHost>
The AllowOverride All line is required. Without it, Joomla’s .htaccess file cannot control URL rewriting. That breaks the entire routing system.
To enable the site and reload Apache, use the following code:
a2ensite joomla.conf

a2dissite 000-default.conf

systemctl reload apache2
Disabling the default Apache site prevents it from intercepting requests meant for your Joomla domain.
Step 5: Install a Free SSL Certificate with Let’s Encrypt
To secure your traffic, install certbot and generate the free SSL certificate from Let’s Encrypt using the following command:
apt install certbot python3-certbot-apache -yBefore running Certbot, confirm two things. First, your domain’s DNS A record must resolve to your server’s IP address.
Second, both ports 80 and 443 must be open in UFW. If either condition is not met, Certbot will fail.
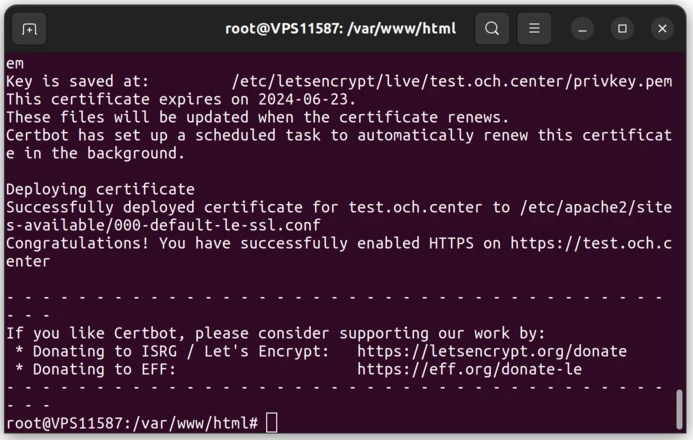
Run Certbot with the following command:
certbot --apache -d yourdomain.com -d www.yourdomain.comCertbot will ask for your email address and ask you to agree to the terms of service.
After that, it generates the certificate and automatically updates the Apache virtual host to serve HTTPS.
The whole process takes under two minutes on most UAE VPS connections.
Remember to open HTTPS traffic in UFW using the following command:
ufw allow 'Apache Full'
ufw delete allow 80/tcp
After this change, the firewall allows both HTTP (port 80) and HTTPS (port 443) through the Apache Full profile.
Step 6: Run the Joomla Web Installer
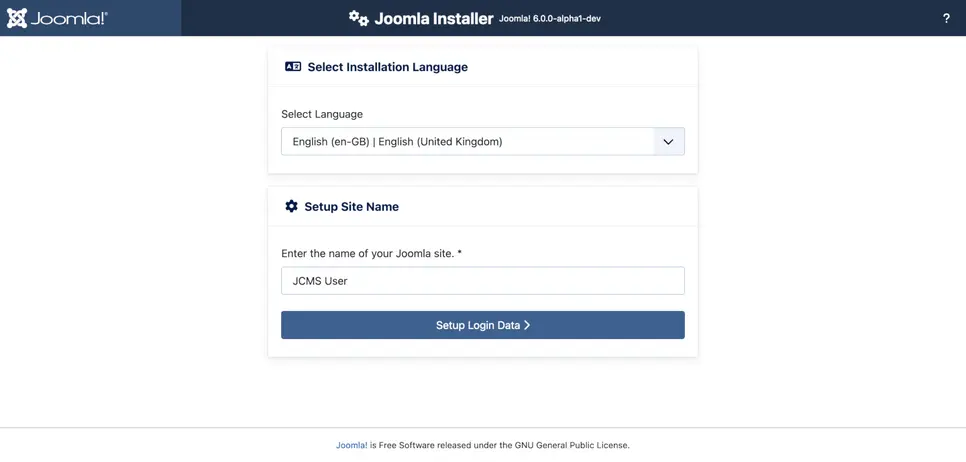
Open your browser and go to https://yourdomain.com. The Joomla 6 installation wizard loads automatically. It runs through three screens.
Screen 1: Site Configuration
| Field | What to Enter |
|---|---|
| Site Name | Your website name |
| Admin Real Name | Your full name |
| Admin Username | A unique username (not “admin”) |
| Admin Password | A strong password, minimum 12 characters |
| Admin Email | Your working email address |
Do not use “admin” as the username. Automated bots target it constantly. Pick something unique.
Screen 2: Database Configuration
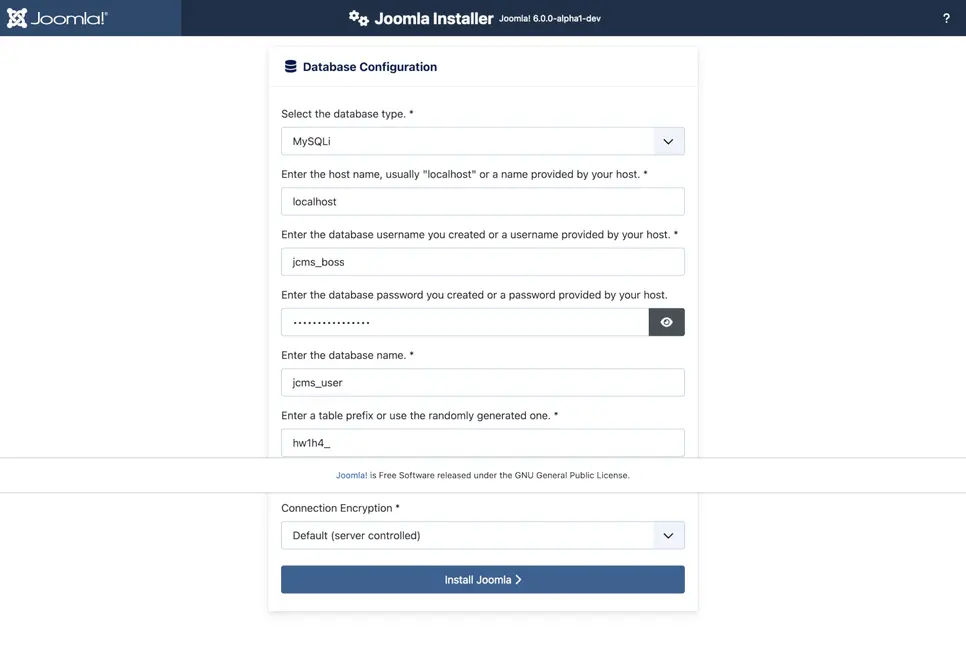
| Field | What to Enter |
|---|---|
| Database Type | MySQLi |
| Hostname | localhost |
| Username | joomlauser |
| Password | The password from Step 3 |
| Database Name | joomla_db |
| Table Prefix | Leave the auto-generated prefix |
Double-check that the database name, username, and password match exactly what you created in Step 3.
A single typo here triggers a database connection error. Watch for accidental spaces at the start or end of the password field.
Installation Summary
On the final screen, review the settings, then click Install Joomla. The installer runs for a few seconds, then displays a success screen.
After installation completes, delete the installation folder immediately. Joomla will not let you use the admin panel properly until you do.
rm -rf /var/www/html/joomla/installation/
Reset the configuration file permissions:
chmod 644 /var/www/html/joomla/configuration.php
Access the Joomla admin panel by visiting:
https://yourdomain.com/administrator
Log in with the admin username and password you set during installation. You should see the Joomla 6 dashboard. Your site is now live.
Frequently Asked Questions
Do I need cPanel to install Joomla on a UAE VPS?
No. This entire guide installs Joomla via SSH on a bare Ubuntu 22.04 server. cPanel adds a control panel on top of these components, but it is not required. It also adds cost to your monthly VPS bill.
What are the minimum VPS specs for Joomla 6?
Joomla 6 runs on 1 GB RAM, but 2 GB is the practical starting point for a live site. Use a VPS with SSD or NVMe storage. Standard spinning-disk storage introduces noticeable latency on database-heavy CMS pages.
Is Joomla 6 compatible with Ubuntu 22.04?
Yes. Joomla 6 requires PHP 8.1 or 8.2, MySQL 8.0+ or MariaDB 10.4+, and Apache or Nginx. Ubuntu 22.04 LTS supports all of these through its default package repositories. No third-party PPAs are needed.
How do I connect my domain to a UAE VPS after installing Joomla?
Go to your domain registrar’s DNS management panel. Create an A record pointing your domain to your VPS IP address. Set the TTL to 300 seconds for faster propagation. Then add your domain as the ServerName value in the Apache virtual host config file.
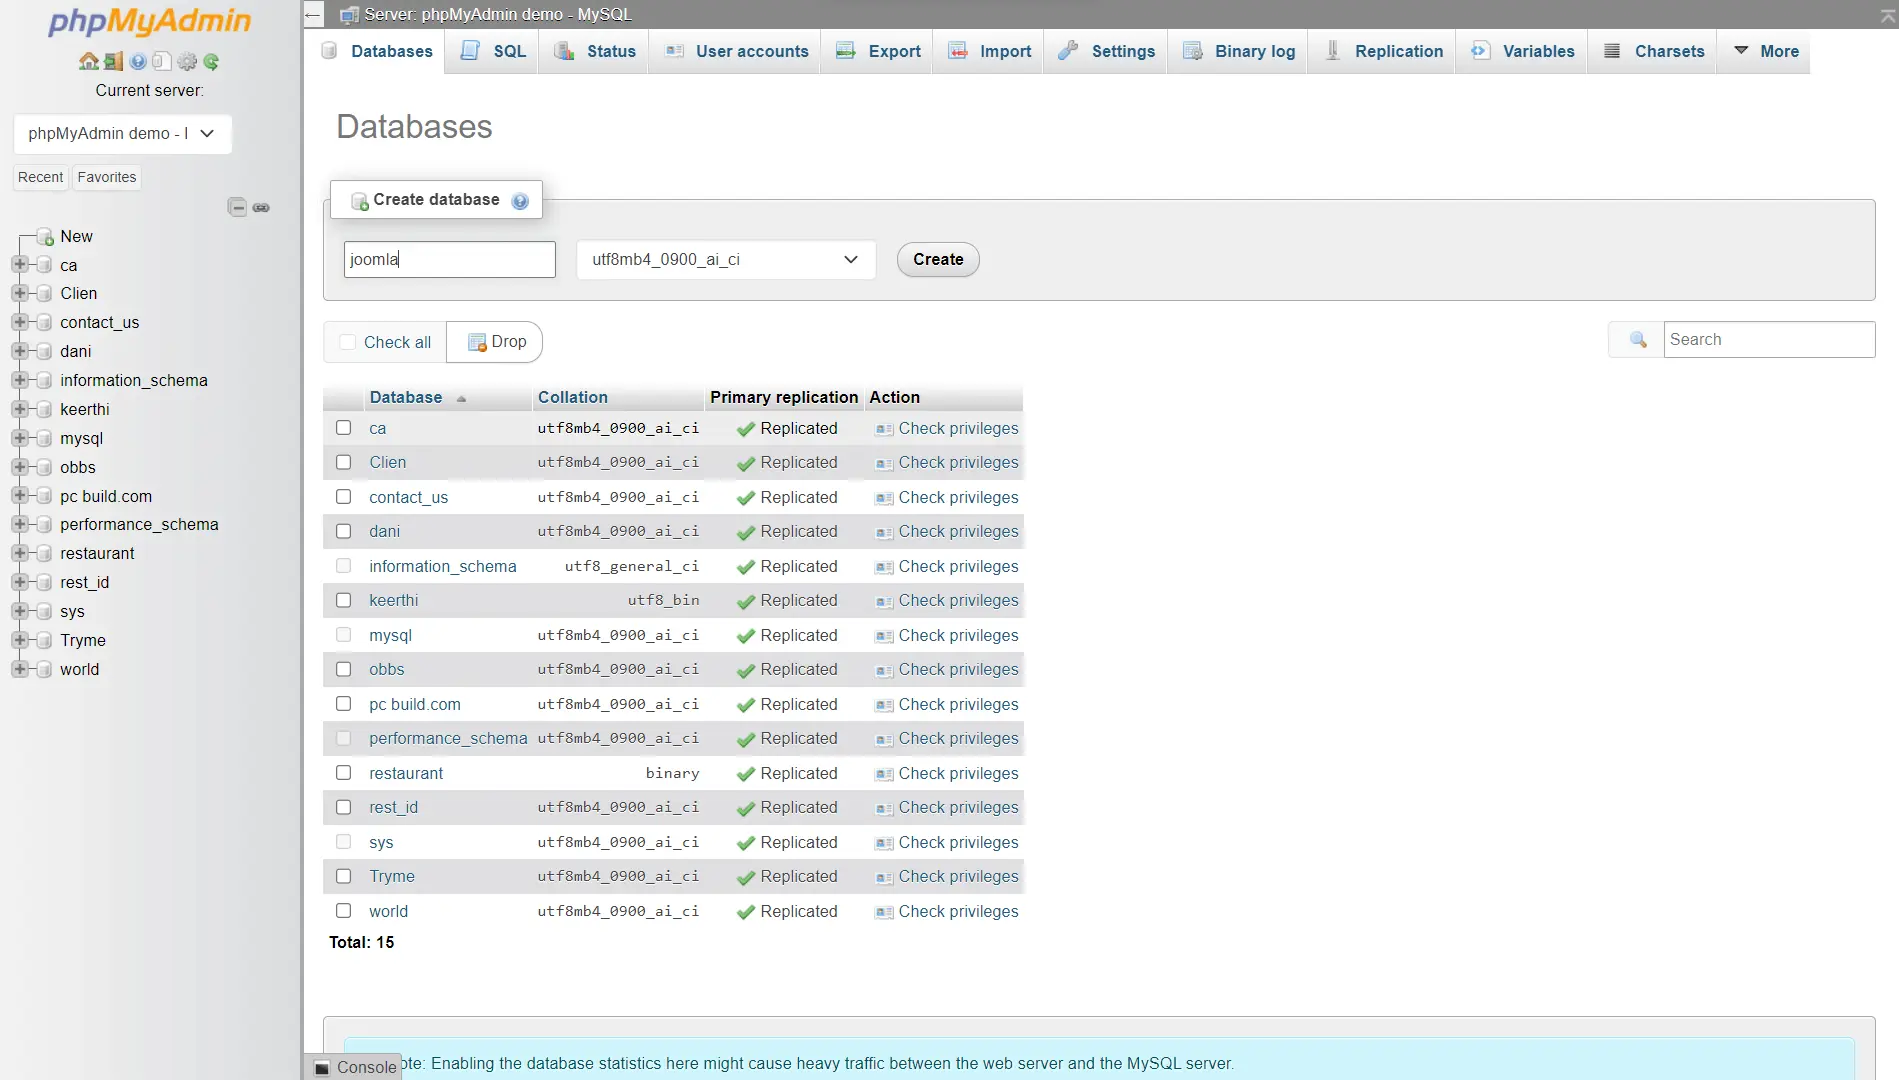
Can I migrate an existing Joomla site to a UAE VPS?
Yes. Export the current site database using phpMyAdmin or mysqldump. Transfer the Joomla files to the new server via SFTP. Import the database into MySQL on the new VPS. Then open /var/www/html/joomla/configuration.php and update the database credentials and the $live_site URL to match the new server.
Set Up Your Joomla Site Today
You now have Joomla 5 running on a secure Ubuntu 22.04 VPS. The LAMP stack is configured. SSL is active. The installation folder is gone. Your firewall is configured correctly for a UAE-facing server.
Getting here was the hard part. Keeping the site running well comes down to three habits. Update Joomla and its extensions regularly. Run backup tests every month, not just set-and-forget. Watch your server resource usage as traffic grows.
Truehost UAE VPS plans run on SSD storage and are backed by reliable performance SLAs. Plans start at 20 AED, which is suitable for new sites. Setup also takes minutes, and support is available if you hit a wall.